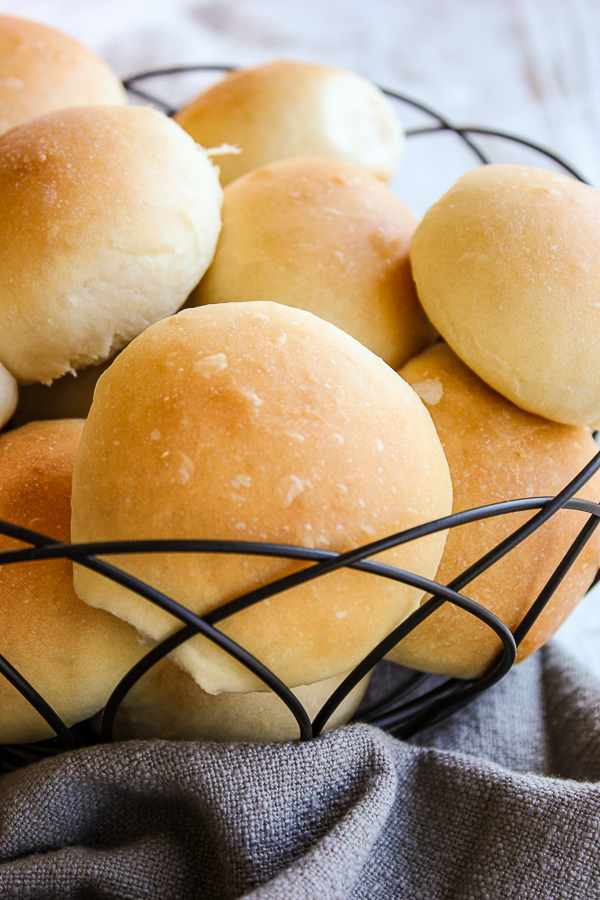
These truly are the perfect homemade dinner rolls. They have a soft, tender texture and turn out perfectly every time. You’ll want to stock your freezer with these beauties.
")
The History of Grandma’s Buns
My Grandma was a really great cook. That left a big impression on me when I was young and gave me inspiration to cook. She was one of those people who made cooking and baking look effortless.
I’m not sure how she did it, but she seemed to have a never-ending supply of baked goods in her freezer. If company stopped over (which seemed to happen a lot at my grandparents house), she would put on a pot of coffee and pull something delicious out of the freezer (like this Chocolate Creme de Menthe Cake).
The thing Grandma was most famous for was making her incredible and perfect dinner rolls. These homemade dinner rolls were affectionately referred to as “Grandma’s Buns”. She always seemed to have some on hand.
They were always a beautiful golden brown and all they really needed was a little melted butter to really put them over the top. My whole family gets excited when these homemade dinner rolls show up on the menu.
I’m fortunate that Grandma was able to pass on one of my favorite dinner roll recipes before she passed away. It would have been a sad day had this great recipe been lost as I haven’t found anything nearly as tasty in the grocery store!
")
Learning from my Grandma
As I was growing up, I wasn’t known as much of a bread maker who experimented with a lot of different bread recipes. But, I definitely wanted to know how to make these homemade rolls. So I spent time with my Grandma to figure out her tricks and techniques.
There were three things she explained to me that she thought were important for me to know. How to work with active dry yeast, the use of sugar in bread recipes and kneading the bread dough. Let’s start with active dry yeast.
Active Dry Yeast versus Instant Yeast
Both active dry yeast and instant yeast work as a leavening agent in bread making (i.e., helps the dough rise). However, you have to “proof” the active dry yeast with water before using (so the yeast is no longer dormant). Instant yeast can be added directly into your dry ingredients without putting it into water first.
(Important note: To proof active dry yeast, you put it into warm water (approximately 110 degrees F). It only takes a few minutes to proof and you will know it is activated once you see it bubbling and expanding.)
Instant yeast was introduced into baking in the early 1970’s. It’s made in basically the same way active dry yeast is made, yet milled into finer particles. Because of this finer milling, there is no need to proof first.
Instant yeast is known as a quick-rising yeast due to the smaller particles and the enzymes and additives included to help dough rise faster. As such, you can skip the first rise of the dough and shape your bread immediately after kneading. This is good if you have a quick baking project.
My Grandma grew up with only active dry yeast available to her and she believed this second rise was essential to getting the right consistency of the bread dough. She was not one to cut corners. So, active dry yeast is is for me!
")
Using Sugar in a Bread Dough Recipe
Why did Grandma use sugar in her perfect dinner roll recipe? Because science!
First, adding sugar into the water and yeast mixture actually speeds up the fermentation process. It provides food for the yeast early in the process before the natural enzymes start to do the work on their own. Basically, it’s a time saver for your yeast mixture.
Second, sugar helps attracts and holds moisture (fancy word for this phenomenon to impress your friends: hygroscopic!). Moisture evaporates from bread as it is being baked. Sugar reduces how much moisture is released, thus resulting in a moister bread.
Third, think about sugar as being somewhat of a tenderizing agent. As you are working your bread dough / batter, it actually works as an aerator to bring about a more creamy and tender consistency to your homemade rolls.
Finally, sugar is a natural preservative. It improves the shelf-life of your rolls by binding free water and reducing water activity.
Now, did Grandma know the science behind all of this? Likely not. But, generations of bakers before her experimented and understood the properties of using sugar which were then incorporated into the recipe cards of the day.
Kneading the Dough
Kneading the bread dough to the proper consistency is also key. There are plenty of YouTube videos out there to help, but here are a few tips:
- Start with clean, dry hands. Things are going to get messy!
- Start forming the dough into a large ball. It will be sticky to start with, but flour will help mitigate that.
- Once you have a dough ball, start “punching” the dough. Put the heel of your hand in the middle of the ball and push forward. Continue doing this as you rotate the dough ball. Do this until the dough has a springy feel to it.
- Now take the dough and fold in half and rock forward on the heels of your hand to flatten it out.
- You’re done when the dough starts looking shiny and smooth. In addition, it should have an elastic feel to it. It can be tacky-feeling, but if it feels sticky at all, then you should continue kneading until getting the look and feel you want.
You Now Have Your Perfect Dinner Rolls
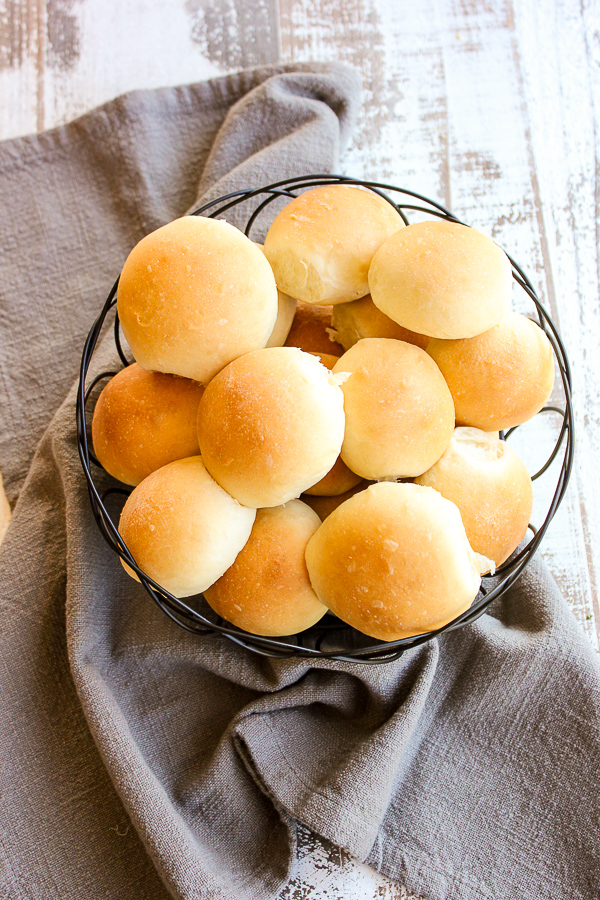
This recipe makes 3 dozen golden brown, delicious homemade rolls. But, don’t be afraid to make a second batch because they freeze beautifully (see below in Tips and Tricks).
It’s great to have a bunch of these rolls on hand in the freezer, especially around the holidays as you’re planning your holiday dinners. And because I think it’s fun, try your hand at making a holiday-themed homemade butter like this amazing Pumpkin Pie Spice Butter. Perfect around Thanksgiving.
And while they’re great as dinner rolls, they’re also awesome as slider rolls! I use them as slider rolls all the time because they stand up so well to toasting and broiling. I’ve also tweaked the recipe to create a larger, less sweet sandwich roll that’s equally delicious.
Put a meatball and a little marinara sauce on one of these and you have yourself a meatball slider. Toast them under the broiler with some leftover ham and cheddar cheese for a delicious and easy ham and cheese slider. Or, melt some Monterey Jack cheese over a chicken tender.
So many options!
So, if you’ve come looking for the perfect dinner roll recipe, you’re definitely in the right place. I’m sure these homemade dinner rolls will definitely become a favorite for your whole family as it did mine.
Enjoy!
")
Tips and Tricks
- These homemade rolls can be made ahead of time and frozen for up to a month.
- If you’re going to freeze these, I find it works best to freeze them in a single layer on a baking sheet pan. Once they’re frozen, transfer them to a freezer bag and store in the freezer.
- You should use warm water – not hot. Hot water will potentially kill the yeast, but warm water will help the yeast to bloom.
- I always use all purpose flour when making these rolls.
Ingredients Needed to Make the Perfect Homemade Dinner Rolls
Full instructions are found below in the recipe card
- Warm water – The water should be no warmer that 110 degrees
- Sugar
- Active dry yeast – This is preferable to instant yeast
- Vegetable oil – This oil is preferred because it has a neutral flavor
- Salt
- Eggs
- Flour
How to Make the Perfect Homemade Dinner Rolls
- Mix 1/2 cup warm water, 1 tsp sugar and active dry yeast together in a glass measuring cup and set aside to rise.
- Mix remaining 1-1/2 cups water, sugar, oil, salt and eggs together.
- Add 3 cups of flour and mix with a mixer until smooth (I use a stand mixer, but a hand-held electric mixer also works well).
- Once yeast has risen to the top of the cup, add to the flour mixture (the yeast gets really bubbly and expands while it sits).
- Add 1 more cup of flour while still using mixer.
- Add last 2 cups of flour and mix with a spoon or the dough hook of your mixer. Do not overmix.
- Put 1/2 cup of flour on a board and put dough on it.
- Knead the dough until flour is worked in. If it’s still really sticky, add more flour a little at a time until it’s just slightly sticky.
- Drizzle some oil in a large bowl, then add the dough and coat with the oil.
- Cover dough with a clean kitchen towel and let dough rise until it doubles (about 1 hour). To rise, heat oven to 200 degrees and turn off, then put dough in the warm oven.
- Once dough is risen, take out of the oven, place dough back onto a lightly floured board, and punch down (flatten and fold over).
- Form into 36 rolls and put on a baking sheet (you will likely need 2) lightly coated with cooking spray. The best way to divide the dough to get uniformly sized rolls is to divide it into thirds and then divide each third in half and then each half into sixths.
- Form each piece into a little ball, trying to keep the bottom fairly flat.
- Let dough rise again for about 1 hour.
- Heat oven to 350 degrees and bake for 18 minutes, or until lightly browned. (Check the bread rolls at 10 minutes, that’s what the original recipe said, but mine took 18 minutes)
More Homemade Bread Recipes to Try
- No Knead English Muffin Bread
- Beer Cheese Bread
- Brioche Hamburger Buns
- Olive Garden Breadsticks
- Overnight Sour Dough Bread
- Homemade Herbed Focaccia Bread
Perfect Homemade Dinner Rolls (aka Grandma's Buns)

These truly are the perfect homemade dinner rolls. They have a soft, tender texture and turn out perfectly every time. You'll want to stock your freezer with these beauties.
Ingredients
- 1/2 cup warm water
- 1 tsp sugar
- 5 tsp active dry yeast (2 packages)
- 1-1/2 cups warm water
- 1/2 cup sugar
- 1/2 cup oil
- 2 tsp salt
- 2 eggs
- 6 cups flour, plus extra 1/2 cup for kneading
Instructions
- Mix 1/2 cup water, 1 tsp sugar and active yeast together in a glass measuring cup and set aside to rise.
- Mix remaining 1-1/2 cups water, sugar, oil, salt and eggs together.
- Add 3 cups of flour and mix with a mixer until smooth (I use a stand mixer, but you can aso use a hand-held electric mixer).
- Once yeast has risen to the top of the cup, add to the flour mixture (the yeast gets really bubbly and expands while it sits).
- Add 1 more cup of flour while still using mixer.
- Add last 2 cups of flour and mix with a spoon or the dough hook of your mixer, do not overmix.
- Put 1/2 cup of flour on a board and put dough on it.
- Knead the dough until flour is worked in. If it’s still really sticky, add more flour a little at a time until it’s just slightly sticky.
- Drizzle some oil in a large bowl, then add the dough and coat with the oil.
- Cover dough with a clean kitchen towel and let rise until it doubles (about 1 hour). To rise, heat oven to 200 degrees and turn off, then put dough in the warm oven.
- Once dough is risen, take out of the oven, place dough back onto a lightly floured board and punch down (flatten and fold over).
- Form into 36 rolls and put on a baking sheet (you will likely need at least 2) lightly coated with cooking spray. The best way to divide the dough to get uniformly sized rolls, is to divide it in to thirds and then divide each third in half and then each half in to sixths.
- Form each piece into a little ball, trying to keep the bottom fairly flat.
- Let bread dough rise again for about 1 hour.
- Heat oven to 350 degrees and bake for 18 minutes, or until lightly browned. (Check the bread rolls at 10 minutes, that’s what the original recipe said, but mine usually take 18 minutes.)
Notes
Most of the prep time is hands-off while the dough rises.
Nutrition Information:
Yield:
36Serving Size:
1Amount Per Serving: Calories: 51Total Fat: 3gSaturated Fat: 0gTrans Fat: 0gUnsaturated Fat: 3gCholesterol: 10mgSodium: 134mgCarbohydrates: 4gFiber: 0gSugar: 3gProtein: 1g
Homemade Sandwich Rolls - Lisa's Dinnertime Dish
Friday 19th of January 2024
[…] am so excited about these sandwich rolls! I took my Grandma’s recipe for dinner rolls and tweaked it a little bit to come up with these beauties. My Grandma’s original recipe is […]
Sourdough Sausage Stuffing - Lisa's Dinnertime Dish
Wednesday 1st of November 2023
[…] Perfect Dinner Rolls […]
Sausage Mushroom Stuffed Pork Loin with Cranberry Mustard Sauce
Friday 22nd of September 2023
[…] Perfect Homemade Dinner Rolls […]
Creamy Italian Chicken Sausage Soup - Lisa's Dinnertime Dish
Thursday 21st of September 2023
[…] Perfect Dinner Rolls […]
Classic Popovers - A Simple 4 Ingredient Recipe - Lisa's Dinnertime Dish
Monday 18th of September 2023
[…] the time, I thought popovers were pretty fancy and likely difficult to make. I could make a mean dinner roll, but I thought homemade popovers might be a bit ambitious. I was so […]