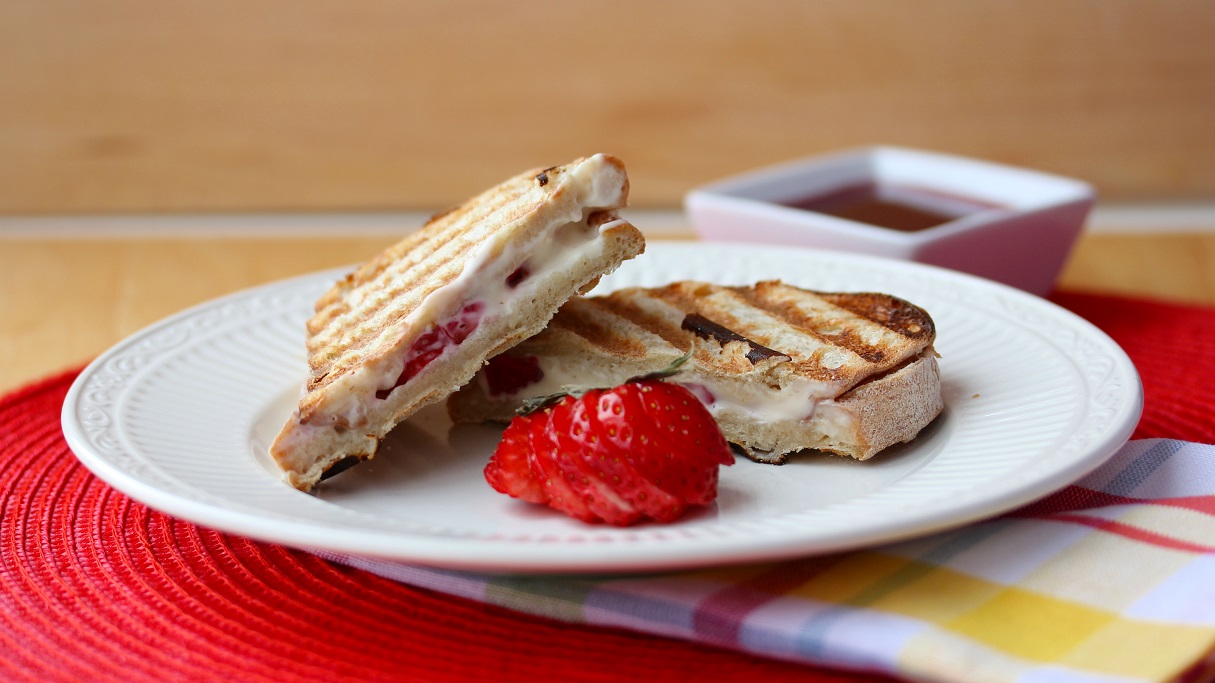
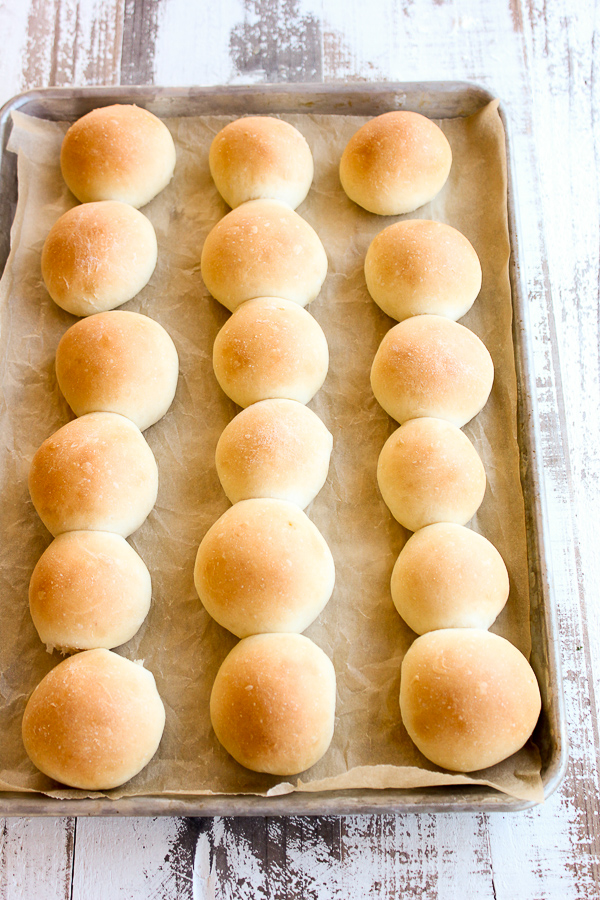
How to Make Homemade Sandwich Rolls
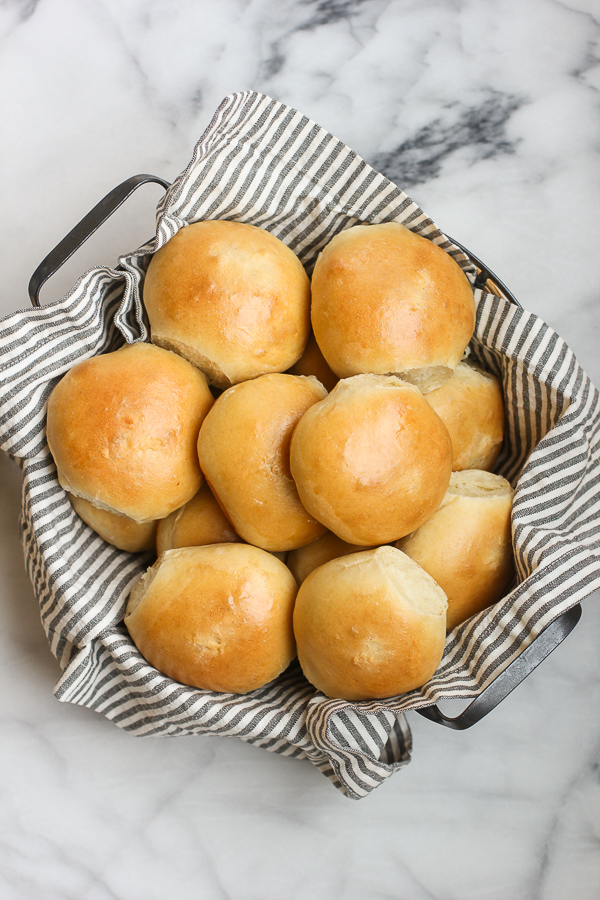
You definitely want to stock your freezer with these Homemade Sandwich Rolls. They’re soft, tender and so perfect for almost any sandwich.
Repurposing Grandma’s Buns!
I am so excited about these sandwich rolls! To start, I have a wonderful family recipe for dinner rolls (click here for those tasty treats) that my Grandma used to make. They’re great to accompany a dinner, but not quite what you would want in a sandwich roll (a little too small and sweet).
To be honest, we mostly make our sandwiches on a pretty delicious sourdough sandwich bread we get at our local grocery store. Same thing with our hamburger buns and any sandwich rolls we might use.
But, the more I thought about my Grandma’s buns, the more I thought I could make my own homemade round sandwich rolls. I just needed to make a couple of tweaks.
Tweaking the Original Dinner Roll Recipe
As I mentioned, my Grandma’s original dinner roll recipe is for smaller rolls that are slightly sweet. I needed these homemade rolls to be less sweet and larger.
So, I cut down on the amount of sugar. Then, I increased the size of the rolls so they are better suited for sandwiches.
The result is a soft and tender roll that is PERFECT for a sandwich!
Tips for Making the Perfect Homemade Sandwich Roll
Making Perfectly Shaped Rolls
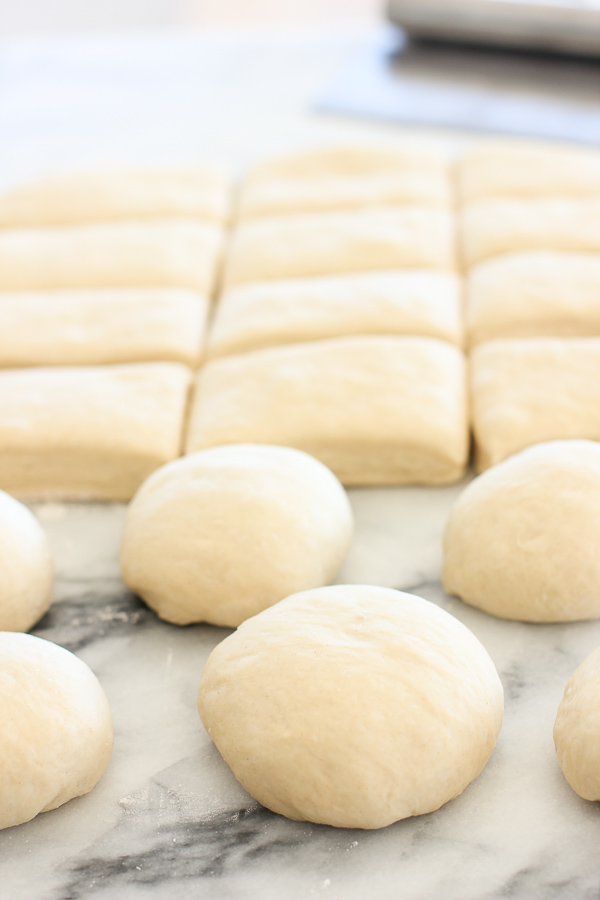
Once you’ve divided up the dough into equal pieces, take each piece of dough and make a smooth round shape. Now, press down to slightly flatten each of the dough balls.
This allows for a slightly larger and slightly flatter roll. The perfect size and shape for sandwich use!
Getting a Beautiful Glossy Sheen
Ever wonder how they get that wonderful glossy look on a sandwich roll? It’s pretty easy.
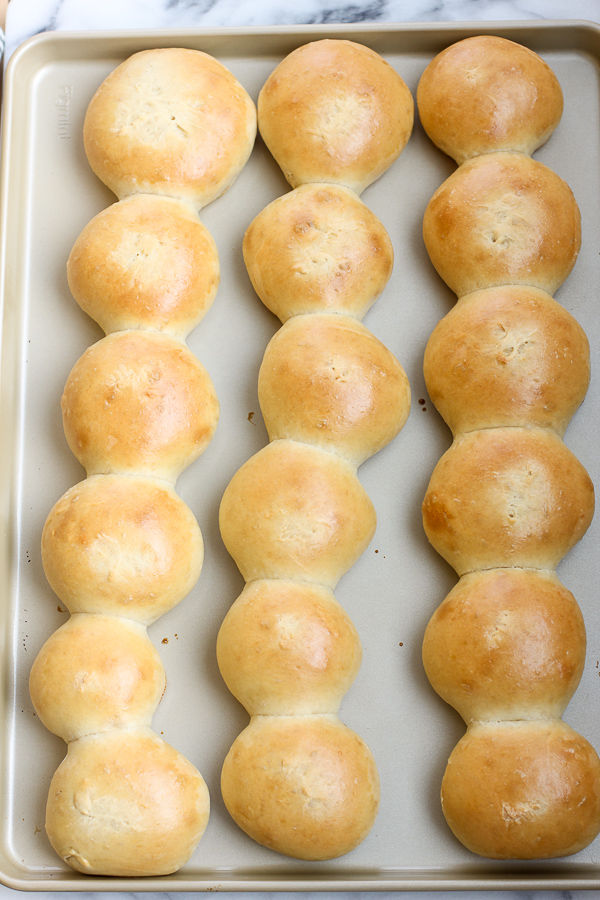
Simply whisk an egg with 1 tbsp water. Then right before putting the rolls into the oven to bake, brush the mixture on the top of the rolls for a golden glossy finish.
Patience with Rise Time
The recipe calls for an hour for the first rise. However, it is more about making sure the dough has risen enough rather than the exact time.
You know the end of the rising time when the dough ball has roughly doubled in size. Sometimes that may take more than an hour and that is ok.
The second rise is pretty much around an hour. The dough will rise some, but we aren’t looking to double in size like the first rise.
Why Use Active Dry Yeast?
In the baking aisle, you will find active dry yeast and instant yeast. Both active dry yeast and instant yeast work as a leavening agent in bread making (i.e., helps the dough rise).
However, you have to “proof” the active dry yeast with water before using (so the yeast is no longer dormant). Instant yeast can be added directly into your dry ingredients without putting it into water first.
Instant yeast was introduced into baking in the early 1970’s. It’s made in basically the same way active dry yeast is made, yet milled into finer particles. Because of this finer milling, there is no need to proof first.
Instant yeast is known as a quick-rising yeast due to the smaller particles and the enzymes and additives included to help dough rise faster. As such, you can skip the first rise of the dough and shape your bread immediately after kneading. This is good if you have a quick baking project.
My Grandma grew up with only active dry yeast available to her and she believed this second rise was essential to getting the right consistency of the bread dough. She was not one to cut corners. So, active dry yeast it is for me (Red Star Yeast is pretty popular)!

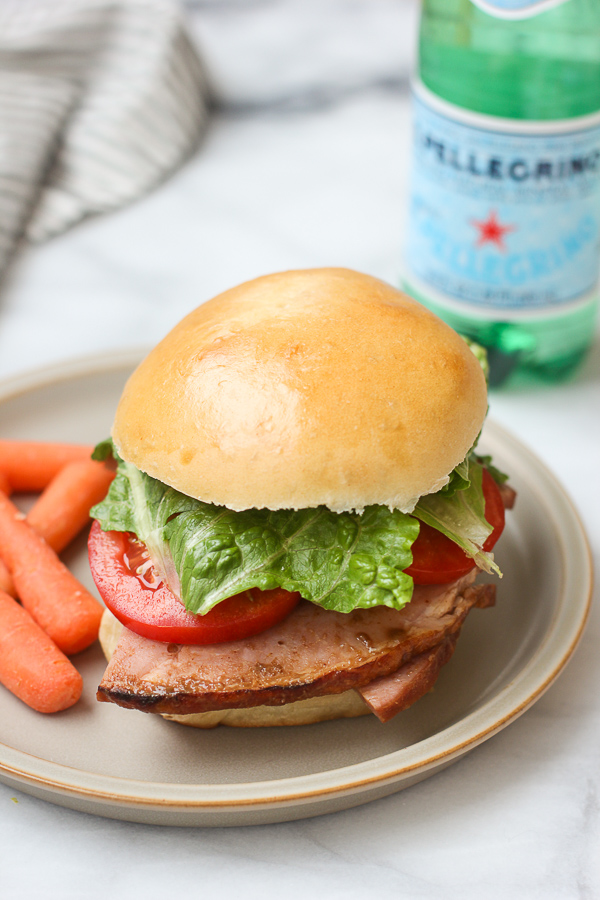
How to Use Homemade Sandwich Rolls
These sandwich rolls are so versatile. There are so many things you can do with a wonderfully soft and tender sandwich roll:
- We made burgers the other night and served them on these rolls. They tasted ah-maaz-ing!
- When we have anything Italian, we love to split the rolls in half, drizzle each half with a little olive oil, toast them up and sprinkle with a little sea salt.
- Of course, these are first and foremost sandwich buns, which means they work with any type of deli sandwich. Just layer on your favorite sandwich fillings and toppings.
- They are perfect for large gatherings. Make a double batch, triple batch, go crazy! Basically, you can make them in batches over several days and freeze until needed. They are a foundational item in our Graduation Party Menu and Tips post, which is all about feeding many on a budget.
Freezing the Sandwich Rolls
Once baked, you want the sandwich rolls to cool to room temperature. You can either leave them on the cookie sheet or transfer them to a cooling rack or wire rack. They cooling rack will allow more air around the rolls and cool them a bit faster.
Once cooled, I like to put them in a single layer in a zip lock bag. However, even cooled, there is still quite a bit of moisture.
To combat this moisture, I nearly seal the bag around a straw. I then suck the air out of the bag, remove the straw and quickly seal the bag. This tends to greatly reduce the amount of condensation you will have in the bag.
Put in the freezer. Like any bread product, they keep well for 2-3 weeks. To thaw, simply take out of the freezer and let them come back to room temperature.
Tips and Tricks
- For best results, make sure the water you use is lukewarm, which is about 105 to 115 degrees. Any warmer than that and it can kill the yeast.
- After you form the dough rolls for the second rise, flatten them slightly with your hand. Since these are sandwich rolls, you want them to have a good amount of surface for the sandwich ingredients. If you don’t flatten them, they’ll end up in more of a ball shape.
- For a glossy finish when the rolls come out of the oven, brush on an egg wash before baking. This is just one egg whisked together with a tablespoon water.
- To freeze the rolls, cool completely and put in a single layer in gallon size zip top bags. Seal the bag almost all the way and insert a straw into the remaining space. Suck as much air out of the bag as you can, remove straw and seal completely. This will prevent condensation in the bag.
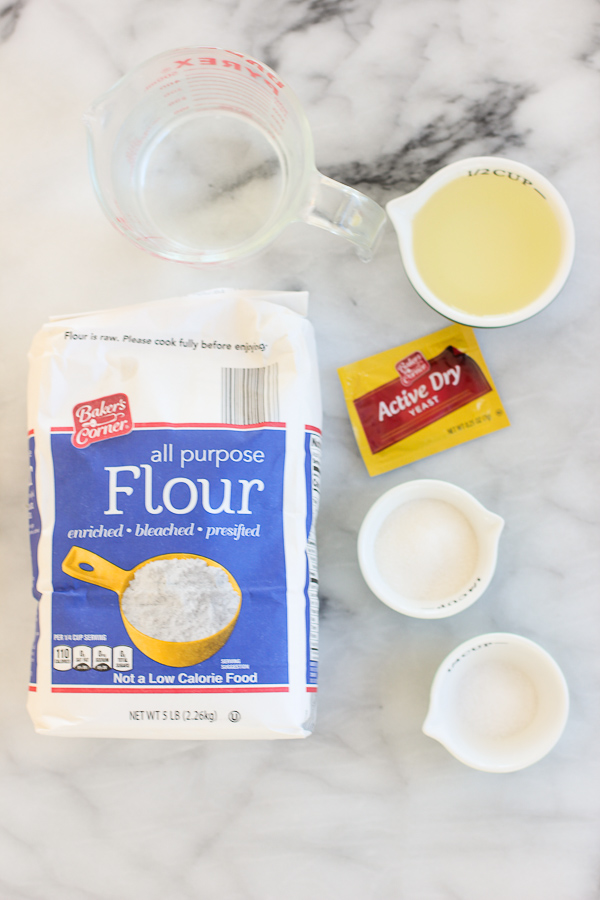
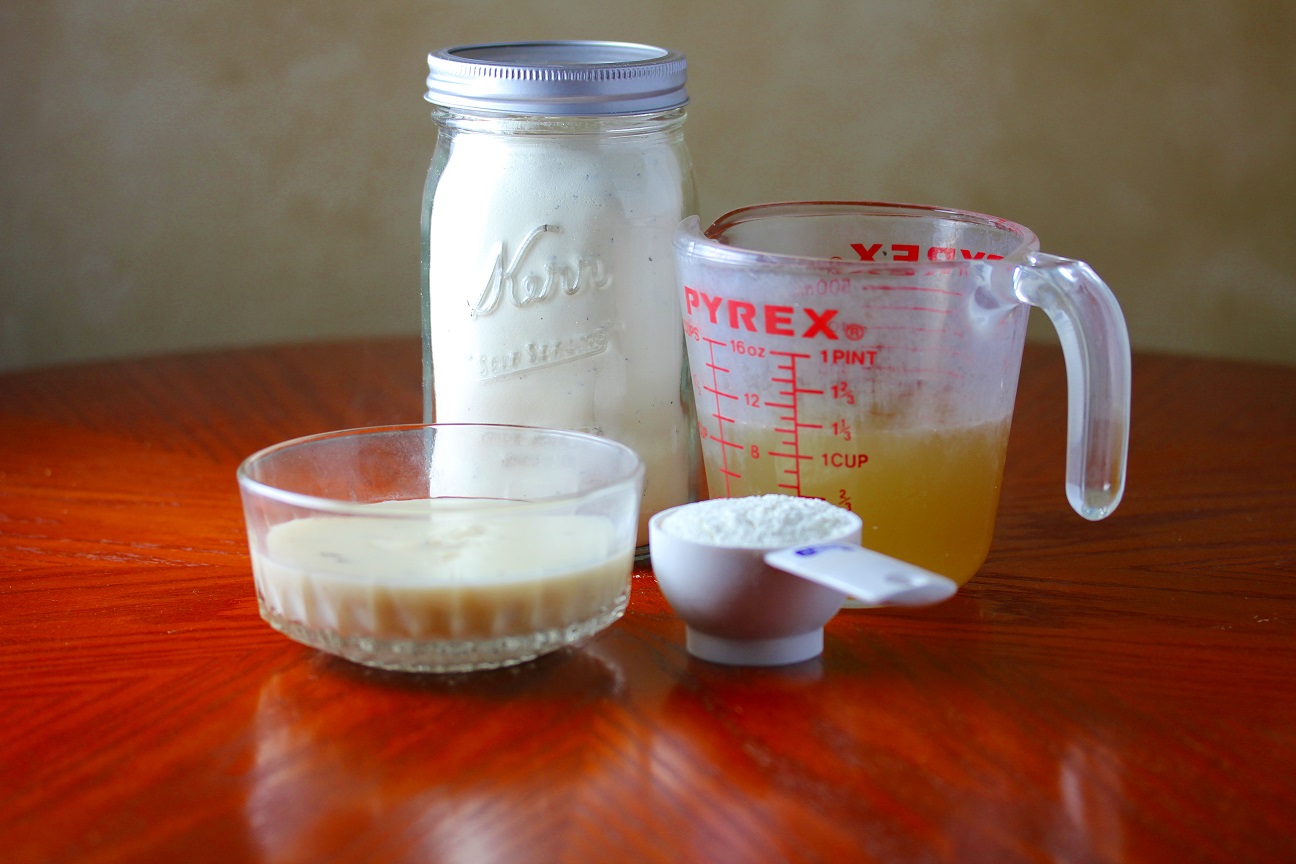
Ingredients Needed to Make Homemade Sandwich Rolls
Full instructions can be found below in the printable recipe card
- Warm water – Warm water helps the yeast to activate and the dough to rise.
- Granulated sugar, divided – Some of the sugar sweetens the rolls just a touch and the rest also helps the yeast to activate.
- Active dry yeast – This is the leavening agent that causes the dough to rise.
- Vegetable oil – This helps to give the rolls a more soft and tender crumb.
- Salt – Salt will enhance the flavor of the rolls.
- Eggs – This will make the rolls lighter and fluffier.
- Flour – All-purpose flour works great with this recipe.
How to Make Homemade Sandwich Rolls
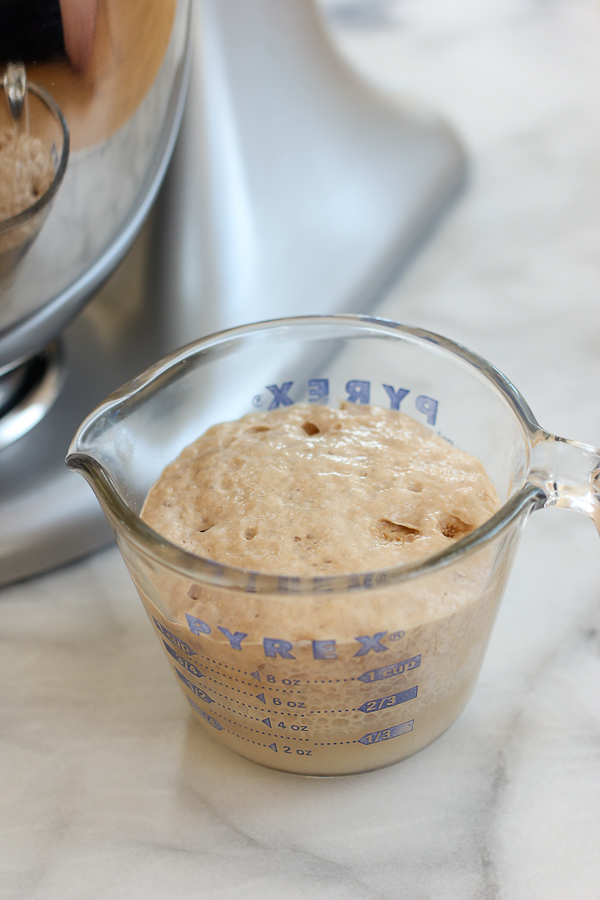
- Mix 1/2 cup water, 1 tsp sugar and yeast together in a glass measuring cup.
- Set aside to rise.
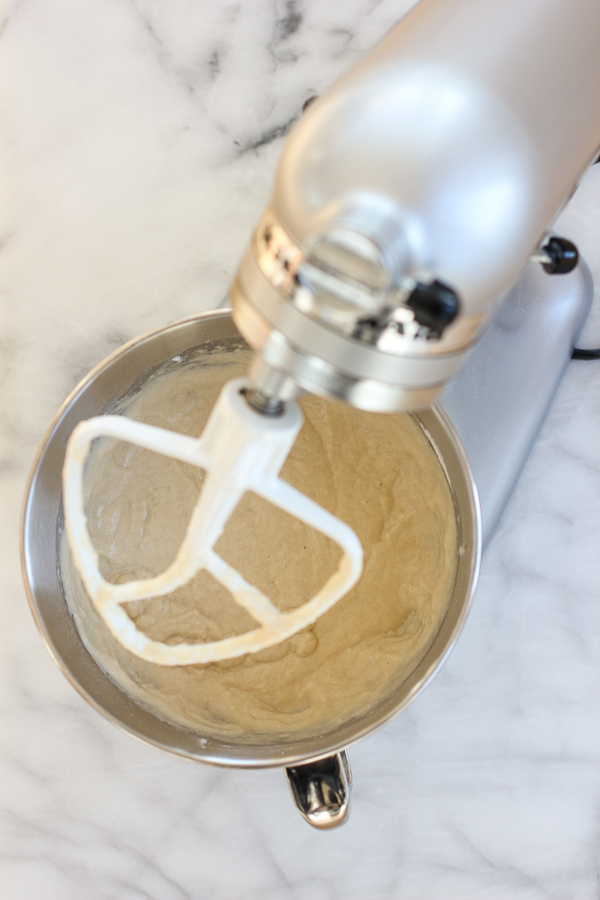
- Mix remaining water, sugar, oil, salt and eggs together in a large mixing bowl (if using a hand mixer) or bowl of your stand mixer.
- Add 3 cups of flour and mix with a mixer until smooth.
- Add yeast mixture to the mixing bowl when it’s almost risen to the top of the cup (the yeast gets really bubbly and expands while it sits).
- Add 1 more cup of flour still using mixer.
- Add last 2 cups of flour and mix with a spoon (if using a hand mixer) or the dough hook of your mixer, do not overmix.
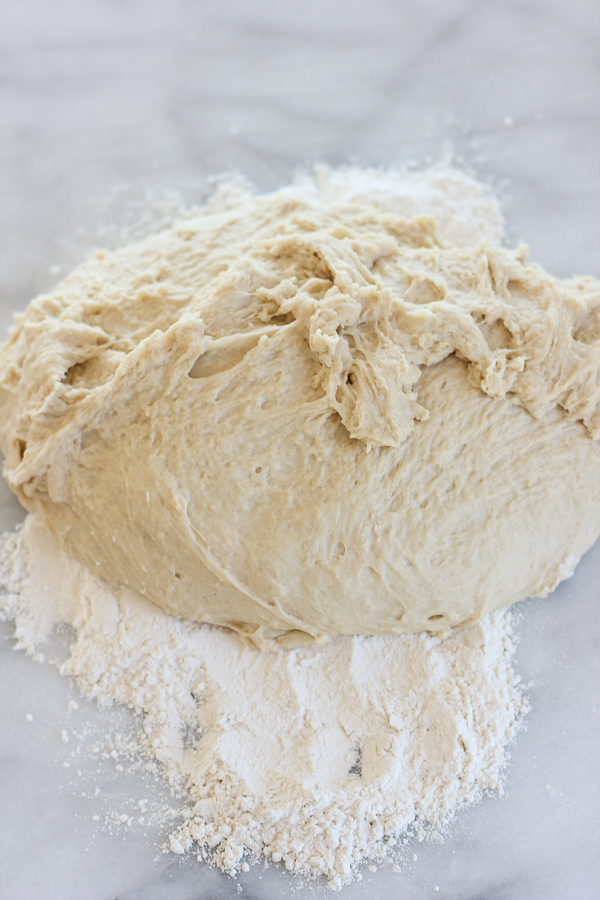
- Spread 1/2 cup of flour on your work surface, placing dough on top of it.
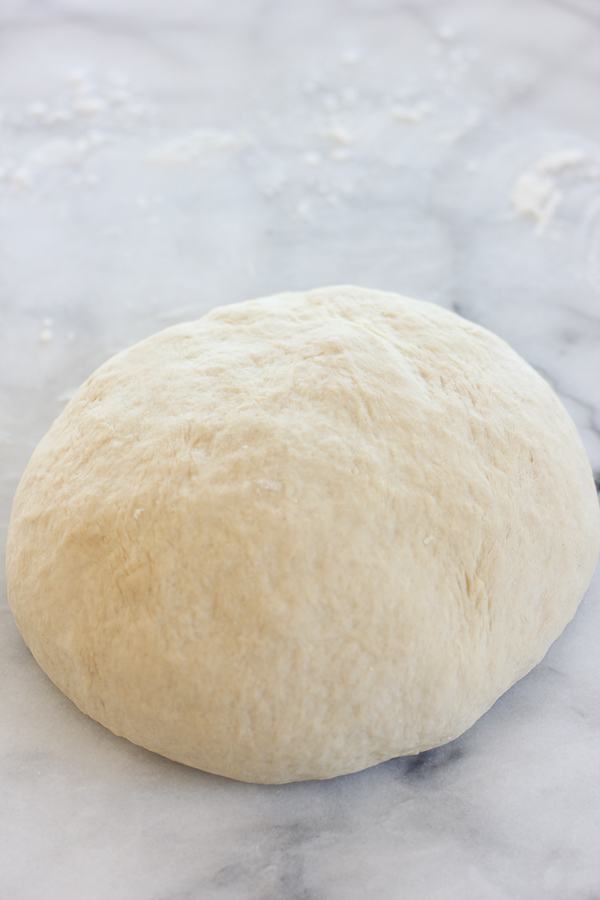
- Knead the dough until flour is worked in. If it’s still really sticky, add flour a little at a time until it’s just slightly sticky – about 10 minutes.
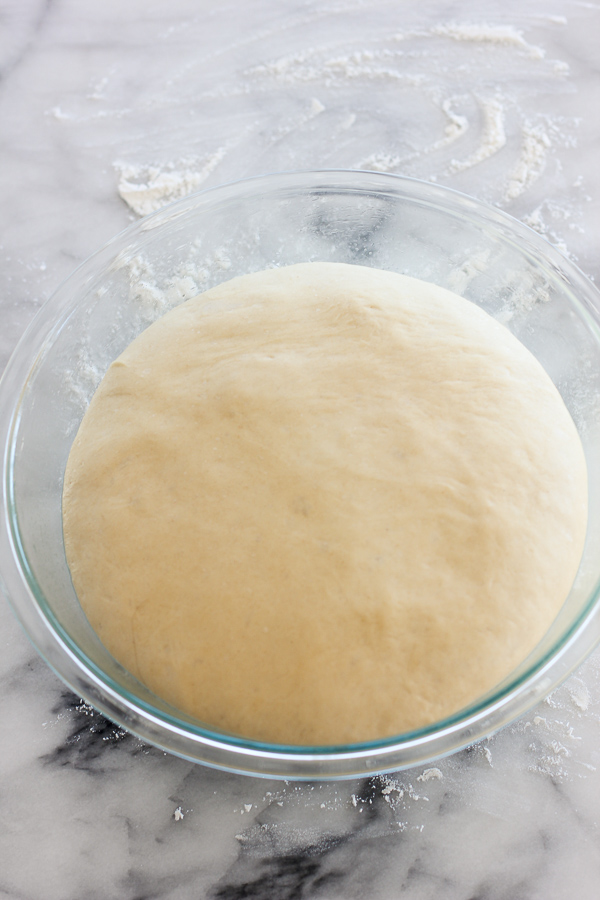
- Drizzle some oil in a bowl, then add the dough and coat with the oil.
- Cover dough with a towel and let rise until it doubles (about 1 hour).
- To help with the rise, use the Proof feature on your oven if you have it, or heat oven to 200 degrees and turn off, then put dough in.
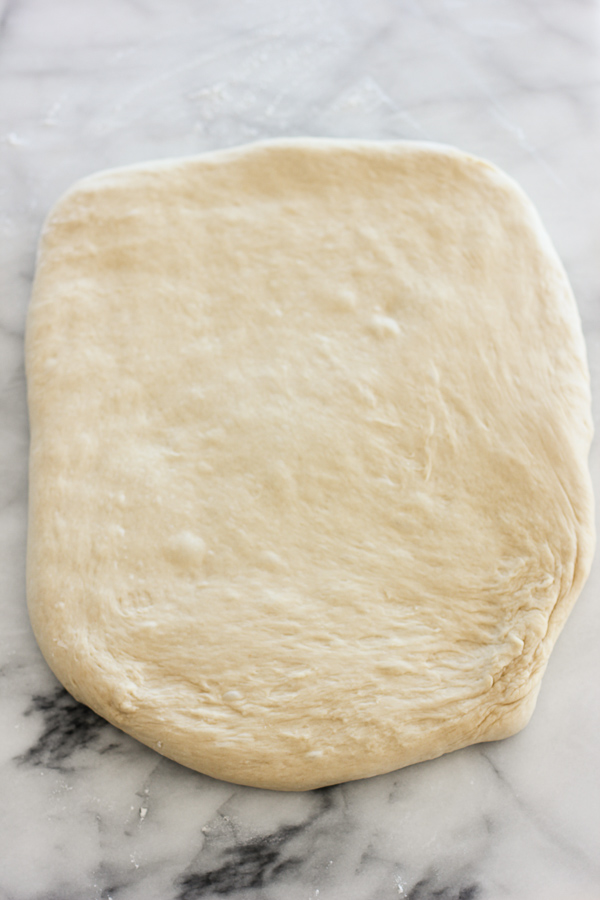
- Once dough has risen, take out of the oven and put dough onto a lightly floured board. Punch down, flatten and fold over forming a rectangle.
- Form the dough into 18 rolls and put on cookie sheets lightly lined with parchment or sprayed with cooking spray.
- I found the best way to divide the dough up to get uniformly sized rolls, was to divide it into 6 strips and then divide each piece into thirds.
- Then form each piece into a ball and press down to flatten slightly.
- Let rise again for about 1 hour on the baking sheet uncovered.
- (Optional: Brush with egg wash prior to baking – see Tips and Tricks above).
- Bake at 350 degrees for 15- 20 minutes, or until lightly browned.
What to Serve on Homemade Sandwich Rolls
- Slow Cooker Pulled Pork
- Sweet and Savory Chicken Salad with Creamy Yogurt Dressing
- Breaded Pork Tenderloin Sandwich
- Easy Ground Turkey Sloppy Joe’s
How to Make Homemade Sandwich Rolls
You will definitely want to stock your freezer with these Homemade Sandwich Rolls. They’re soft, tender and so perfect for almost any sandwich.
Ingredients
- 2 cups warm water, divided
- 2 tbsp plus 1 tsp sugar, divided
- 5 tsp active dry yeast (2 packages)
- 1/2 cup vegetable oil
- 2 1/2 tsp salt
- 3 eggs, divided
- 6 cups flour, plus 1/2 cup
Instructions
- Mix 1/2 cup water, 1 tsp sugar and yeast together in a glass measuring cup.
- Set aside to rise.
- Mix remaining water, sugar, oil, salt and eggs together in a large mixing bowl (if using a hand mixer) or bowl of your stand mixer.
- Add 3 cups of flour and mix with a mixer until smooth.
- Add yeast when its almost risen to the top of the cup ( the yeast gets really bubbly and expands while it sits).
- Add 1 more cup of flour still using mixer.
- Add last 2 cups of flour and mix with a spoon (if using a hand mixer) or the dough hook of your mixer, do not overmix.
- Spread 1/2 cup of flour on your work surface, placing dough on top of it.
- Knead the dough until flour is worked in. If it’s still really sticky, add flour a little at a time until it’s just slightly sticky - about 10 minutes.
- Drizzle some oil in a bowl, then add the dough and coat with the oil.
- Cover dough with a towel and let rise until it doubles (about 1 hour).
- To help with the rise, use the proof feature on your oven, if you have it, or heat oven to 200 degrees and turn off, then put dough in.
- Once dough has risen, turn out, back onto a lightly floured board and punch down, flatten and fold over forming a rectangle.
- Form the dough into 18 rolls and put on cookie sheets lightly lined with parchment or sprayed with cooking spray.
- I found the best way to divide the dough up to get uniformly sized rolls, was to divide it into 6 strips and then divide each piece into thirds.
- Then form each piece into a ball and press down to flatten slightly.
- Let rise again for about 1 hour on the baking sheet uncovered.
- Whisk remaining egg with 1 tbsp water. Brush mixture on the tops of the rolls for a golden glossy finish.
- Bake at 350 degrees for 15- 20 minutes, or until lightly browned.
Nutrition Information:
Yield:
18Serving Size:
1Amount Per Serving: Calories: 83Total Fat: 7gSaturated Fat: 1gTrans Fat: 0gUnsaturated Fat: 6gCholesterol: 31mgSodium: 337mgCarbohydrates: 3gFiber: 0gSugar: 0gProtein: 2g
Enjoy!

Love homemade rolls. These look gorgeous. Thanks for sharing with Thursdays Treasures
Thanks Christie! I have to say, these didn’t last for long at my house!! 🙂
I’ve been looking for a good homemade bread recipe to make meatball subs with. I tried this recipe today, but made them long and slim like sub rolls. It does NOT work for subs. However, the bread itself was delicious with just a little butter. I believe that this recipe is the ultimately perfect bread for French toast though! We tried it and it was the most incredible French toast I’ve ever had. Highly recommend trying! Oh, and its also pretty simple to make… Which is a perk.
I never thought of using it for French toast, Katie. I’ll have to give that a try. I’m sorry it didn’t work for sub rolls. I’m curious to know what the problem was, was it too soft?
Yes, it’s too soft for sub rolls. Even for larger hamburger buns it breaks up because it’s soft. It is delicious. I didn’t even think of trying it for French toast, but give me about an hour and I’ll tell you!!!!
I made these today. They are delicious! I will definitely be making them again.
Yay!! I’m so glad you liked them Chris! 🙂
Made these my 1st batch was kinda salty I did use 2tsp salt. My 2nd batch tweaked it a lil instead of 2tsp salt i just did with 1tsp salt. Came out DELISH! My first time making any kinda rolls. lol! by far these are thee BEST! nice and soft… Thanx for sharing 🙂
Any chance next time you make these you could check what your ingredients weigh?? In Australia we have a different cup measurment to yours and it makes it really hard! I can easily convert oz to metric but weight it just sooo much easier thanks.
I will do that Anne-Marie! 🙂
I was wondering if these might freeze well. Any experience freezing them? Or a hunch?
Hi Sara,
These rolls freeze beautifully! I freeze them all the time. 🙂
Wondering if you can freeze the dough once made? Or only the freshly baked? And if you can feeeze dough what’s the baking process then? Thanks for your time!
Hi Tricia! I have never frozen the dough before, only the freshly baked rolls. Although, I think it would freeze just fine. I would let it do the first rise and then wrap it tightly in plastic and then freeze. When you’re ready to bake, let it thaw in the fridge, then form into the rolls, let them rise and bake.
I hope this helps!
Lisa
Can I prepare the Dough in a Bread Machine?
I have never tried this in a bread maker (I don’t have one). So I hate to make a recommendation since I’m not sure how you would adapt the method. All I can say is go ahead and give it a try. If you do try it, I would love to hear how they turn out!
I made these on Monday to go with our shredded italian beef sandwiches! They were so good and unlike the ones I usually by in the bakery section they weren’t too much bread for the sandwich and they didn’t get soggy! AMAZING! I’ll be making these again and again!
I’m so glad you liked these Kelly! 🙂
1) Can I use hand instead of mixer?
2) Can I follow this recipe to make cinnamon bread?
You certainly could mix these by hand, Theresa, the mixer just makes it easier. I think this dough would work great to make cinnamon bread. In fact, I’ve used a variation of this recipe to make cinnamon rolls and they turned out great!
Lisa
Made them today for pulled pork sandwiches. Awesome recipe! I used a little less salt and substituted 2 cups of flour with whole wheat flour…came out delicious! Thank you!
This recipe is great! I just made it for bar-b-q and it’s perfect. So easy I won’t be buying buns anymore. Thanks! Keep up the great work! 🙂
How do you generally freeze these – in ziploc bags or otherwise? And how long do you need for them to defrost properly? thanks!!
Hi Sarah,
I freeze these in a single layer in gallon size ziploc bags. They defrost pretty quickly, usually within a couple of hours.
HI Sarah,
My kids loved these – served pulled pork on them. Perfect texture – not airy – I think they need the full 2tsp salt, I only put in 1 and just from the smell I could tell they needed a bit more.(I’m gluten free – hard when making bread:( ). Thanks for the great recipe!!!
I did make these in my bread machine – just put on the dough setting. Came out beautiful.
Erika
I’m so glad these were a hit with your kids, Erika! That’s also good to know that they worked well in a bread machine!
Thank you for taking the time to take and include pictures Lisa. It has been so helpful. I’ve made the rolls a few time and they turn our wonderful each and every time.
You’re welcome, Stacey! I’m glad to hear that these have turned out well for you!
Lisa
Beautiful rolls Lisa. How fortunate to have our grandmother’s recipe and how they hold up as the best over time.
I love a fresh baked roll! These sound so so good!
LOVE homemade bread!!! Mmm this looks soo wonderful!!!
These look delicious! I love that they are good for sandwiches; I mean, the sandwich is one of my favorite meals! I don’t think I’d need to freeze them though. LOL
My goodness these rolls look amazing! I can almost smell them baking in the oven – perfection!!
I love homemade bread, but have never made it myself! I really need to give this a try!
I always buy rolls from the bakery – I love that I won’t have to now!
Homemade bread is the absolute best! Pretty sure I would eat these all ny themselves before I could even make a sandwich. Yum!
These are amazing! It is so hard to find decent bread where I am. They think wonder bread is the only bread… I love that these will make cute mini sandwiches for my kids lunchboxes!
These are the prettiest rolls! Love the idea of freezing them to use when we want. Who doesn’t love fresh baked bread?! I can smell them baking now 🙂
Oh my word!! I can almost smell them baking!! I must try these!!
Are you adding a tray of water to add steam at all?
Meg – I have not done that with these. They are meant to be a soft roll.
Great recipe!! Made them for pulled pork
So glad I stumbled upon this recipe. I have tried several others but they just never look or act or taste like roll. These are PERFECT !! Great flavor and texture. I did take them out when done and brushed with butter and then returned them for a couple more minutes !!
Great recipe that is easy to follow, uses everyday ingredients. Not even all that time consuming considering it is bread !
Thanks Heather! I’m so glad to hear that you liked these! I haven’t ever brushed them with butter, but I love that idea, I’m going to give that a try next time I make these.
Would you consider posting your grandma’s original dinner rolls recipe? These are delicious, but I’m also on the hunt for a thanksgiving dinner roll for this year!
Here is the link to her dinner rolls, Isabelle: https://lisasdinnertimedish.com/perfect-dinner-rolls-aka-grandmas-buns/
Thank you!
I’m so glad I came across this recipe. It was easy and the finished product looked exactly like the rolls I but at the bakery for chicken salad sandwiches. And when I cut them open, the texture is the same too! So glad I can make them fresh myself now. I didn’t need a lot of rolls so I cut this recipe in half. So happy with the results.
The recipe is easy and the rolls are delicious! I wanted a “slider” size bun for brisket for a party but didn’t want to pay the price for slider buns at the store. I made these the morning of the party and they were the hit of the party!! So glad I came across this recipe. It’s definitely a keeper! Thank you for posting.
Thanks for the comment! I’m so glad to hear these worked out for you!
I made these tonight, and they formed out perfect! Thanks so much for sharing! This is the first bun recipe I have tried that I’ve actually liked.
I’m so glad to hear that these turned out well for you!
Hi!! So I’m making these now and can’t wait to see how they come out! Just one question, I’m making these for the kids’ lunch sandwiches for school. The problem I had before with other breads was that I pre-make the lunches in the evening and refrigerate them overnight, but the other recipes I used just got too hard for the kids. If I did that with these, how would they come out.
I’m planning on opening the bread and freezing it so that each sandwich is fresh. Maybe letting it defrost in fridge as a sandwich would work???
I haven’t tried refrigerating these rolls myself, but I think your best bet would be to defrost them in the refrigerator as a sandwich.
Tried this today and they are amazing! I’ve tried other receipes, but this is the best! Will make again and again!
Ah-mazing ! First timer here for bread. -Bannock I do, but we needed something different. We did 9 rolls for smoked pulled sandwiches. These turned into monsters but definitely hamburger style w the fluflly beautifulness that makes any bun desirable. This will definitely be in our family cook book for dinner rolls/ buns. I love the delicate side of the bread, so shh. Don’t tell.
I’m so glad to hear you loved these! Thanks for the comment!
I’m making these today. Do you use all purpose flour or bread flour. Thank you.
How is this only 3 carbs?
Making these today. I was working on 2 bread recipes and got them mixed up. Used your ingredients and the directions for the other recipe which was for loaves. Wondered why it wasn’t quite coming together the way you described <<>> Anyway, I baked the loaves for 35 min in two 9×5 pans. They are a bit heavier than other loaves I have baked but the loaves are delicious. Very tender and moist. I made a 2nd batch, this time following the whole recipe and they are currently in the 2nd rise. If they are as good as they look, they will be delicious! I did wind up with 19 rolls. For a slightly OCD person you can weigh your dough. Mine are nice sized at 26 gms each but that is what gave me 19 rolls.
These worked beautifully for me today – gorgeous light brown crust, tender in the middle and delicious fresh from the oven with butter and jam; can’t wait to use these for sloppy joes tonight!
I made these yesterday and they were fantastic. Best roll recipe that I have tried to date. I made 12 rolls and a small loaf of bread. Everything was perfect.
These rolls are nice for sandwiches. I used a calorie calculator and for that much oil, egg, and flour, for 18 rolls, they are just over 170 cals each (79). Makes sense though because that’s like two small slices of bread. Thanks for the recipe!
@Maryann, So glad that you liked them!
Can’t complain about this recipe. I am not a big bread maker. I make sticky buns at Christmas so that is all I know about yeast. Made these for chicken salad and although they are not perfectly shaped, they taste so good. Will make these again.
@Cynthia, Thanks for the comment, I’m glad to hear you enjoyed them!
Hi Lisa,
I was wondering if I could use milk instead of water in this recipe.
I’m just wondering how they would turn out.
Thanks for your help.
Kelly
Hi lisa. I am confused on the eggs. Recipe says ‘divided’ but unsure what you mean? Can you clarify? Thx!