Turkey Roasting Basics: How to Make the Best Turkey
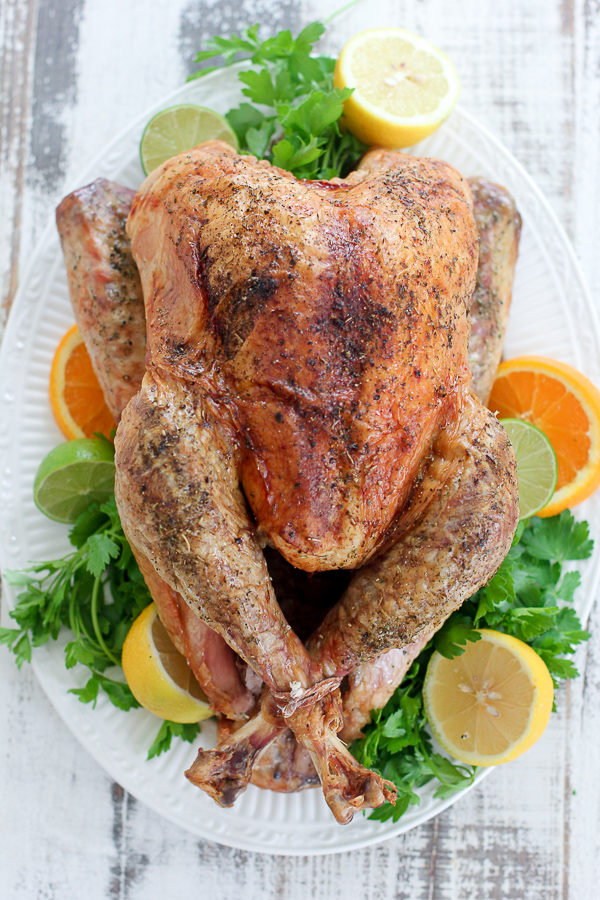
Here you will find all the tips and tricks you need for roasting a tasty turkey. I promise it’s not the daunting task you may think it is.
Ok – so you’re looking at the whole turkey in front of you and saying “How do I cook this thing?”. If this is your first turkey, let’s take the mystery out of the turkey roasting process for you. You don’t want any more stress before Thanksgiving dinner!
Fresh Turkey or Frozen Turkey?
You are really good either way. I personally like the taste of a fresh turkey better than a frozen turkey. However, a fresh turkey typically costs more because of how quickly they need to transport them to consumers.
And, there are times when fresh turkeys just might not be available. So, a frozen turkey is still a great option!
Prepping the Turkey
If you are using a frozen turkey, please see below in Tips and Tricks on how to thaw using cold water. Once you have your fresh or thawed turkey, remove from the refrigerator and put on a washable cutting board. I highly recommend working with refrigerated poultry and not have it at room temperature to reduce the potential for any spoiling.
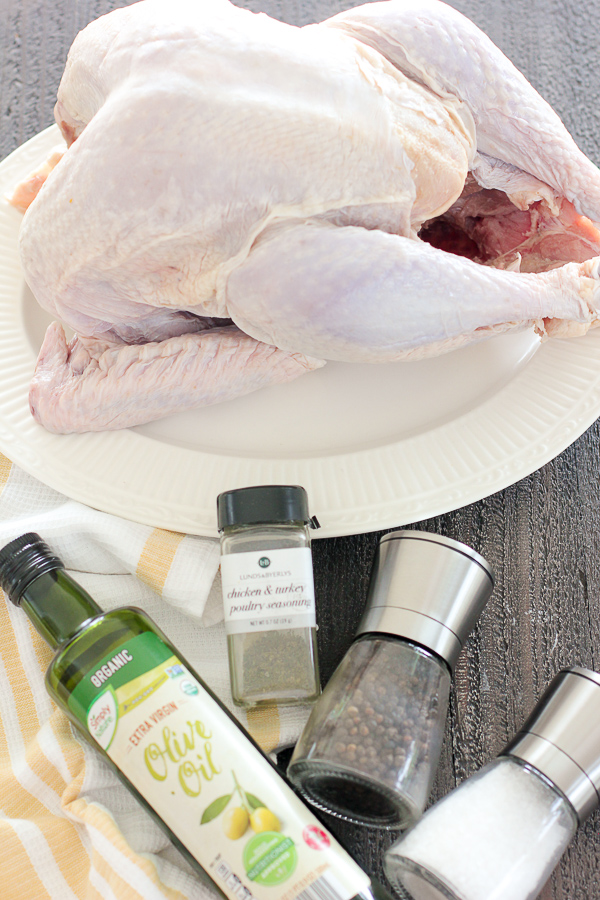
At this point, you will take out what is in the cavity of the turkey. This usually consists of the turkey neck and a bag of giblets (things like the heart, liver, gizzard and other organs). I often save these to use when making turkey stock.
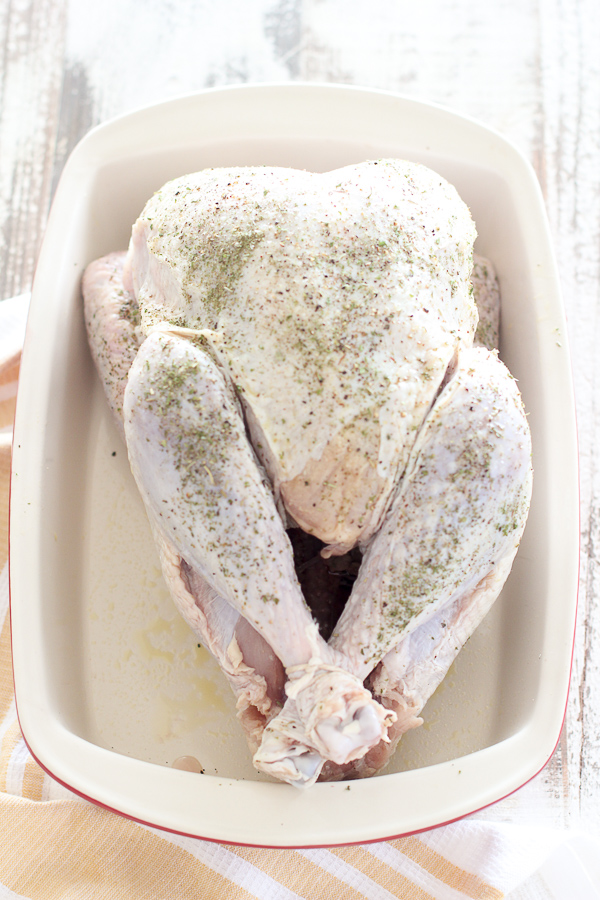
Next, I tuck the wings of the turkey underneath the body (see picture below). It can be a little tricky, but trust me, you can maneuver those things into place!
I do this because it helps the air flow around the whole turkey and allows it to cook more evenly. However, even if you don’t do this, if you are using a roasting rack in the roasting pan, you will still get good air flow.
Pat the inside and outside of the turkey dry using paper towels. Rub olive oil on the outside of the turkey. This accomplishes two things – it will help the skin get crispy and golden brown and it will help the seasonings adhere tothe turkey.
Pat the seasonings onto the outside of the turkey. If you don’t have poultry seasoning, simple salt and pepper is a great alternative.
To Stuff or Not To Stuff
At this point, you can determine whether to put in a stuffing of your choice in the body cavity or not. For this recipe, I chose not to have a stuffed turkey for ease of cooking.
However, an easy alternative is to cut up some vegetables like carrots, celery and onion to add a little more flavor to the turkey. Or, you can make your own stuffing and put right in the body cavity (and yes, you can eat it once the turkey has finished cooking!). This Apple Cranberry Leek stuffing or this Sourdough Sausage stuffing would be delicious!
Regardless of whether you stuff the body cavity or not, the last thing I do is truss up the legs using kitchen twine. This is another technique to help the turkey cook evenly.
You are now ready to put the turkey in the roasting pan.
Roasting Pan Alternatives
I do prefer a roasting pan with a roasting rack to set the turkey on. Mostly because it is easy to take the turkey out of the pan and use the turkey drippings on the bottom of the pan to make the gravy without dirtying another dish!
However, I have roasted turkeys in baking dishes without a roasting rack and they come out just fine. I’ve even used a disposable aluminum pan in a pinch.
Once you’ve decided on your pan, put the bird into that and you are ready to put into the oven.
Convection versus Conventional Oven
A convection oven has a fan and exhaust system that circulates hot air within the oven itself. This is great to have if you do a lot of multi-rack cooking as it eliminates hot and cold areas within the oven to allow for more even cooking.
A conventional oven usually has the heating elements on the bottom and therefore, items on the bottom rack tend to cook faster than those on the top rack.
As such, you do not have to have a convection oven at as high of a temperature as a conventional oven. I like to cook turkey at 325 degrees if using a convection oven or 350 degrees if using a conventional oven.
Since the turkey is likely the only thing in the oven while roasting, either type of oven is fine. For this turkey recipe, I used a conventional oven. For my Rosemary Orange Roast Turkey recipe, I used a convection oven. Both turned out fantastic!
Cooking the Turkey
I do get a lot of questions about how long to cook a turkey, especially if this is your first turkey. It can also be confusing if the size of your turkey is not 10-12 pounds as in this recipe.
A good rule of thumb for a cook time is around 15 minutes per pound. This may vary slightly if you have a very small or very large turkey, but by and large it works well.
How do you know when the turkey is done? First of all, a meat thermometer is a must.
An old-school meat thermometer that has a dial works well. It just takes some time to register the temperature.
These days, you can find an instant-read thermometer that takes just a second or two to measure. The instant-read thermometer is all I use anymore.
Your turkey is done when the meat thermometer reads 165 degrees in the thickest part of the breast and the thickest part of the thigh registers around 175 degrees. Some people will take the turkey out about 5 degrees below these temperatures.
Their reasoning is that the bird will continue to cook around another 5 degrees as it rests and they feel it is more juicy in the end. I would start with my recommended temperatures, but as you get more proficient in your turkey roasting, you too can experiment with what you believe works best.
Let It Rest
Once the turkey is out of the oven you do not have the perfect turkey yet! You need to allow the juices to settle back into the turkey to ensure you have moist turkey meat.
I typically tent with aluminum foil and let it rest for 20-30 minutes. I have actually let it sit longer while finishing up all the side dishes and it still comes out flavorful and juicy.
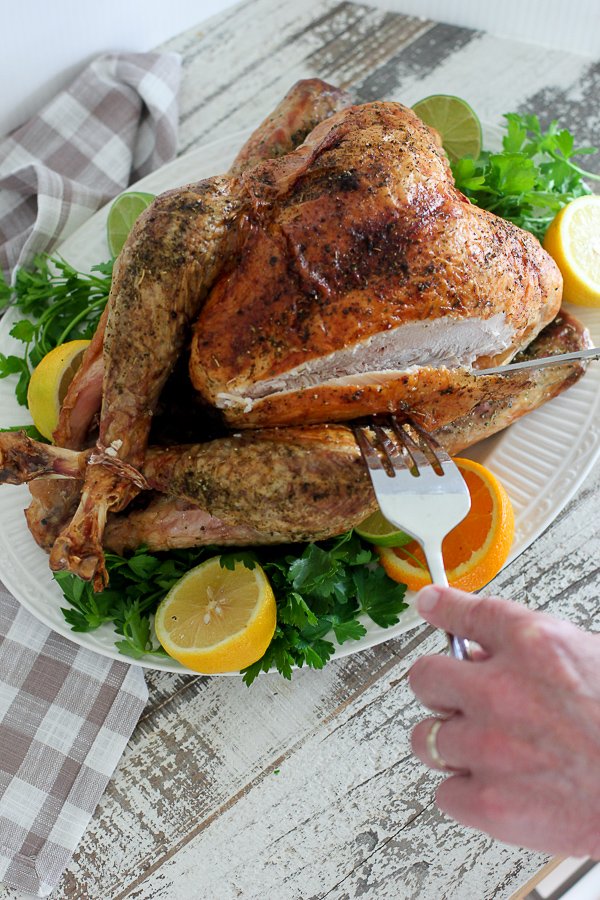
Once the time has passed, you are ready to slice your turkey. There are a lot of great Youtube videos out there showing both easy and fancy ways to carve and present your beautiful roasted turkey.
And now it’s time to dig into the fruits of your labor!
Enjoy!
Tips and Tricks
- If your turkey is frozen, there are two ways to defrost it. The first way would be to refrigerate it for 2-3 days. If you need it defrosted quicker, you can put the turkey (still in its plastic packaging) in a sink filled with cold water. This cold water method will defrost the turkey within a few hours.
- Make sure to roast the turkey breast side up, tuck the wings underneath and truss the legs with kitchen twine. You will get the beautiful golden skin as a result of having the turkey breast side up and tucking the wings to allow maximum air flow.
- Trussing the legs helps the turkey to cook evenly.
- It is best to rest the turkey for 20-30 minutes under an aluminum foil tent. This will allow the juices to soak into the meat and will ensure a moist turkey.
- While you let the turkey rest, it’s a great time to put any sides that need baking into the oven.
- If your sides are not finished within that 20-30 minute resting time, no worries. As long as you keep the turkey tented with aluminum foil it will stay warm.
Ingredients Needed to Make this Roast Turkey
Full instructions can be found below in the printable recipe card
- Turkey – Fresh or frozen turkey will work for this recipe.
- Olive oil
- Poultry seasoning – This is a combination of sage, thyme, rosemary, marjoram, nutmeg and onion powder. It is readily available at most grocery stores.
- Salt
- Pepper
- Kitchen twine – This is used to truss the turkey legs together, which allows for more even cooking.
Turkey Cooking Basics: How to Roast a Turkey
- Preheat oven to 325 degrees if using a convection oven or 350 degrees if using a conventional oven.
- Unwrap turkey (I find it easiest to do this in the sink), remove neck and giblets. Rinse turkey in cold water and pat dry with paper towels.
- Place turkey in a large roasting pan. If you have a roasting rack, you’ll want to use that as well. If you don’t have one, don’t stress out about it, your turkey will still turn out fine.
- Tie legs together with kitchen twine.
- Drizzle olive oil over the turkey and rub onto the skin. Sprinkle liberally with poultry seasoning, salt and pepper and pat that onto the skin.
- Tent turkey with aluminum foil for the first hour of roasting.
- Roast in preheated oven, uncovered, for about 2½ hours. The cooking time will depend on your oven and how big your turkey is. You can use 15 minutes per pound as a guide.
- Once the turkey is done, let it rest, loosely covered with aluminum foil for about 20-30 minutes.
Delicious Sides to Serve with Your Roast Turkey
- Panko Parmesan Green Bean Casserole
- Maple Brown Butter Roasted Sweet Potatoes
- Ultimate Garlic Mashed Potatoes
- Wild Rice Stuffing
- Sourdough Sausage Stuffing
- Easy Cornbread Dressing
- TikTok Arugula Salad
- Cranberry Chutney
- Perfect Dinner Rolls
Turkey Roasting Basics: How to Make the Best Turkey

Here you will find all the tips and tricks you need for roasting a juicy turkey. No stress required.
Ingredients
- 10-12 lb fresh or frozen turkey
- olive oil
- 1-2 tsps poultry seasoning
- 1 tsp salt
- 1/2 tsp pepper
- kitchen twine
Instructions
- Heat oven to 325 degrees if using a convection oven or 350 degrees if using a conventional oven.
- Unwrap turkey (I find it easiest to do this in the sink), remove neck and giblets. Rinse turkey in cold water and pat dry with paper towels.
- Place turkey in a large roasting pan. If you have a roasting rack, you’ll want to use that as well. If you don’t have one, don’t stress out about it, your turkey will still turn out fine.
- Tie legs together with kitchen twine.
- Drizzle olive oil over the turkey and rub onto the skin. Sprinkle with poultry seasoning, salt and pepper and pat that into the skin.
- Tent turkey with aluminum foil for the first hour of roasting.
- Roast in preheated oven, uncovered, for about 2½ hours. The cooking time will depend on your oven and how big your turkey is. You can use 15 minutes per pound as a guide. (Note: My oven always seems to cook the turkey fast. This turkey was 12lbs and it was done in about 2½ hours. You’ll know it’s done when the thigh meat is 170 degrees or when the juices run clear if you cut into it. If the skin starts to get too dark, cover the turkey loosely with a piece of foil.)
- Once the turkey is done, let it rest, loosely covered with aluminum foil for about 20-30 minutes. After that, carve and serve with all of your wonderful Thanksgiving sides!
Notes
The guideline for serving size is a pound of turkey per person. My general rule of thumb is to err on the side of caution, so I said 8-10 servings for this recipe. That way you should have plenty for all your guests and who doesn't like leftover turkey?
Nutrition Information:
Yield:
8Serving Size:
1Amount Per Serving: Calories: 82Total Fat: 6 gSaturated Fat: 4 gTrans Fat: 0gUnsaturated Fat: 2 gCholesterol: 15 mgSodium: 119mgCarbohydrates: 8gFiber: 1gSugar: 0gProtein: 1g
ENJOY!

